


If you’re anything like me, you feel absolutely naked if your nails aren’t done. I love getting them done at a salon but A. they are hella expensive and B. it takes too long for my schedule. But logging 2 hours a week at-home painting your nails is also no bueno. That’s why at-home gel manicures are my go-to. They stay on for two weeks minimum, are quick AF to do (thank you, uv nail light) and are inexpensive when you invest in some good products at the start (keep reading for product list).
The How-To:
1. Buff, trim and shape your nails how you want.
2. Wash your hands without soap and make sure there are no fuzzes left behind from the drying towel on your nails. (I learned the hard way…)
3. Apply a layer of base coat. Cure under light for 120 seconds.
4. Apply a layer of the gel color polish. Cure under light for 120 seconds.
5. Apply another layer of colored gel polish. Cure under light for 120 seconds.
6. Depending on your color, you can either go for the top coat and cure for 120 seconds or go for another gel color polish layer & cure, then apply top coat and cure and viola- you’re done!
7. To get the full salon experience, I then apply a thin layer of cuticle oil to my nail beds to finish off the look!
Tip: to ensure your nail polish stays for a long time, always apply very thin layers of polish and leave a teeny space in between your cuticle and your polish.
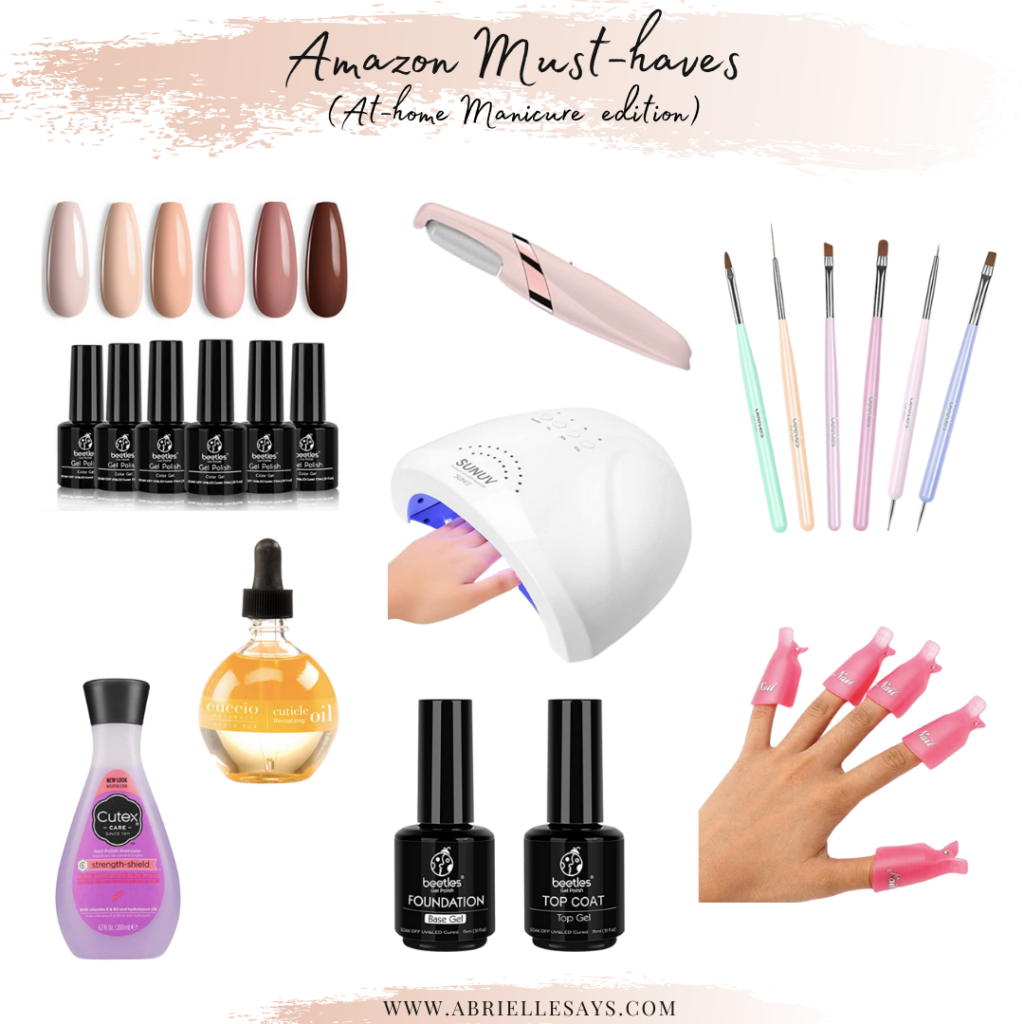
Product Breakdown (clickable links)
Beetles Gel Polish Kit. There are so many color options but I got the nude set for a good starting kit. This is the best gel polish I have found to date!
Electronic callus remover. Ain’t nobody got time for nasty, dry, callused hands or feet. NOPE. Not today, not ever.
Gel Nail Art Brush Set. I use these primarily for removing any mess ups on the skin around my nails but you can get creative with them and do nail designs too. I’m just not at that level yet lolz
UV LED Nail Lamp. I have used several at-home lights and this one is the best by a long shot (and a great price). What I love about it is that it is light weight and easy to store and it’s also big enough to put your whole hand in it to cure all your nails at once.
Nail Polish Remover. This is a given. Any brand works.
Milk and Honey Cuticle Revitalizing Oil. I put this on at the end of my manicure to moisturize the cuticles.
Beetles No Wipe Gel Top Coat & Base Coat Set. This is the same brand of the colored nail polish I like. Great base and top coat and you don’t have to wipe it down with alcohol after applying like they do in the nail salon.
Plastic Gel Nail Polish Soak Off Cap Clips. Ever avoided a gel mani at home because you dreaded the day you had to rip off the polish and wreck your nails? SAME. These are absolute game changers. File off the top coat layer of your gel polish, generously soak cotton balls in nail polish remover, then set them on your nail, clip on the cap clip, wait 10 mins and your gel polish will lift right off!
This at-home gel mani routine and products are my go-to way to get a salon-worthy mani for a quarter of the price and time. Hope you like! xx